You asked us on social media "How to paint skies?" and we passed along your question to master painters of WAS-H! In this article Fred Kingwill, landscape artist, teacher and WAS-H member breaks down this complicated subject for us and gives his best tips and examples. Here are Fred's recommendations.
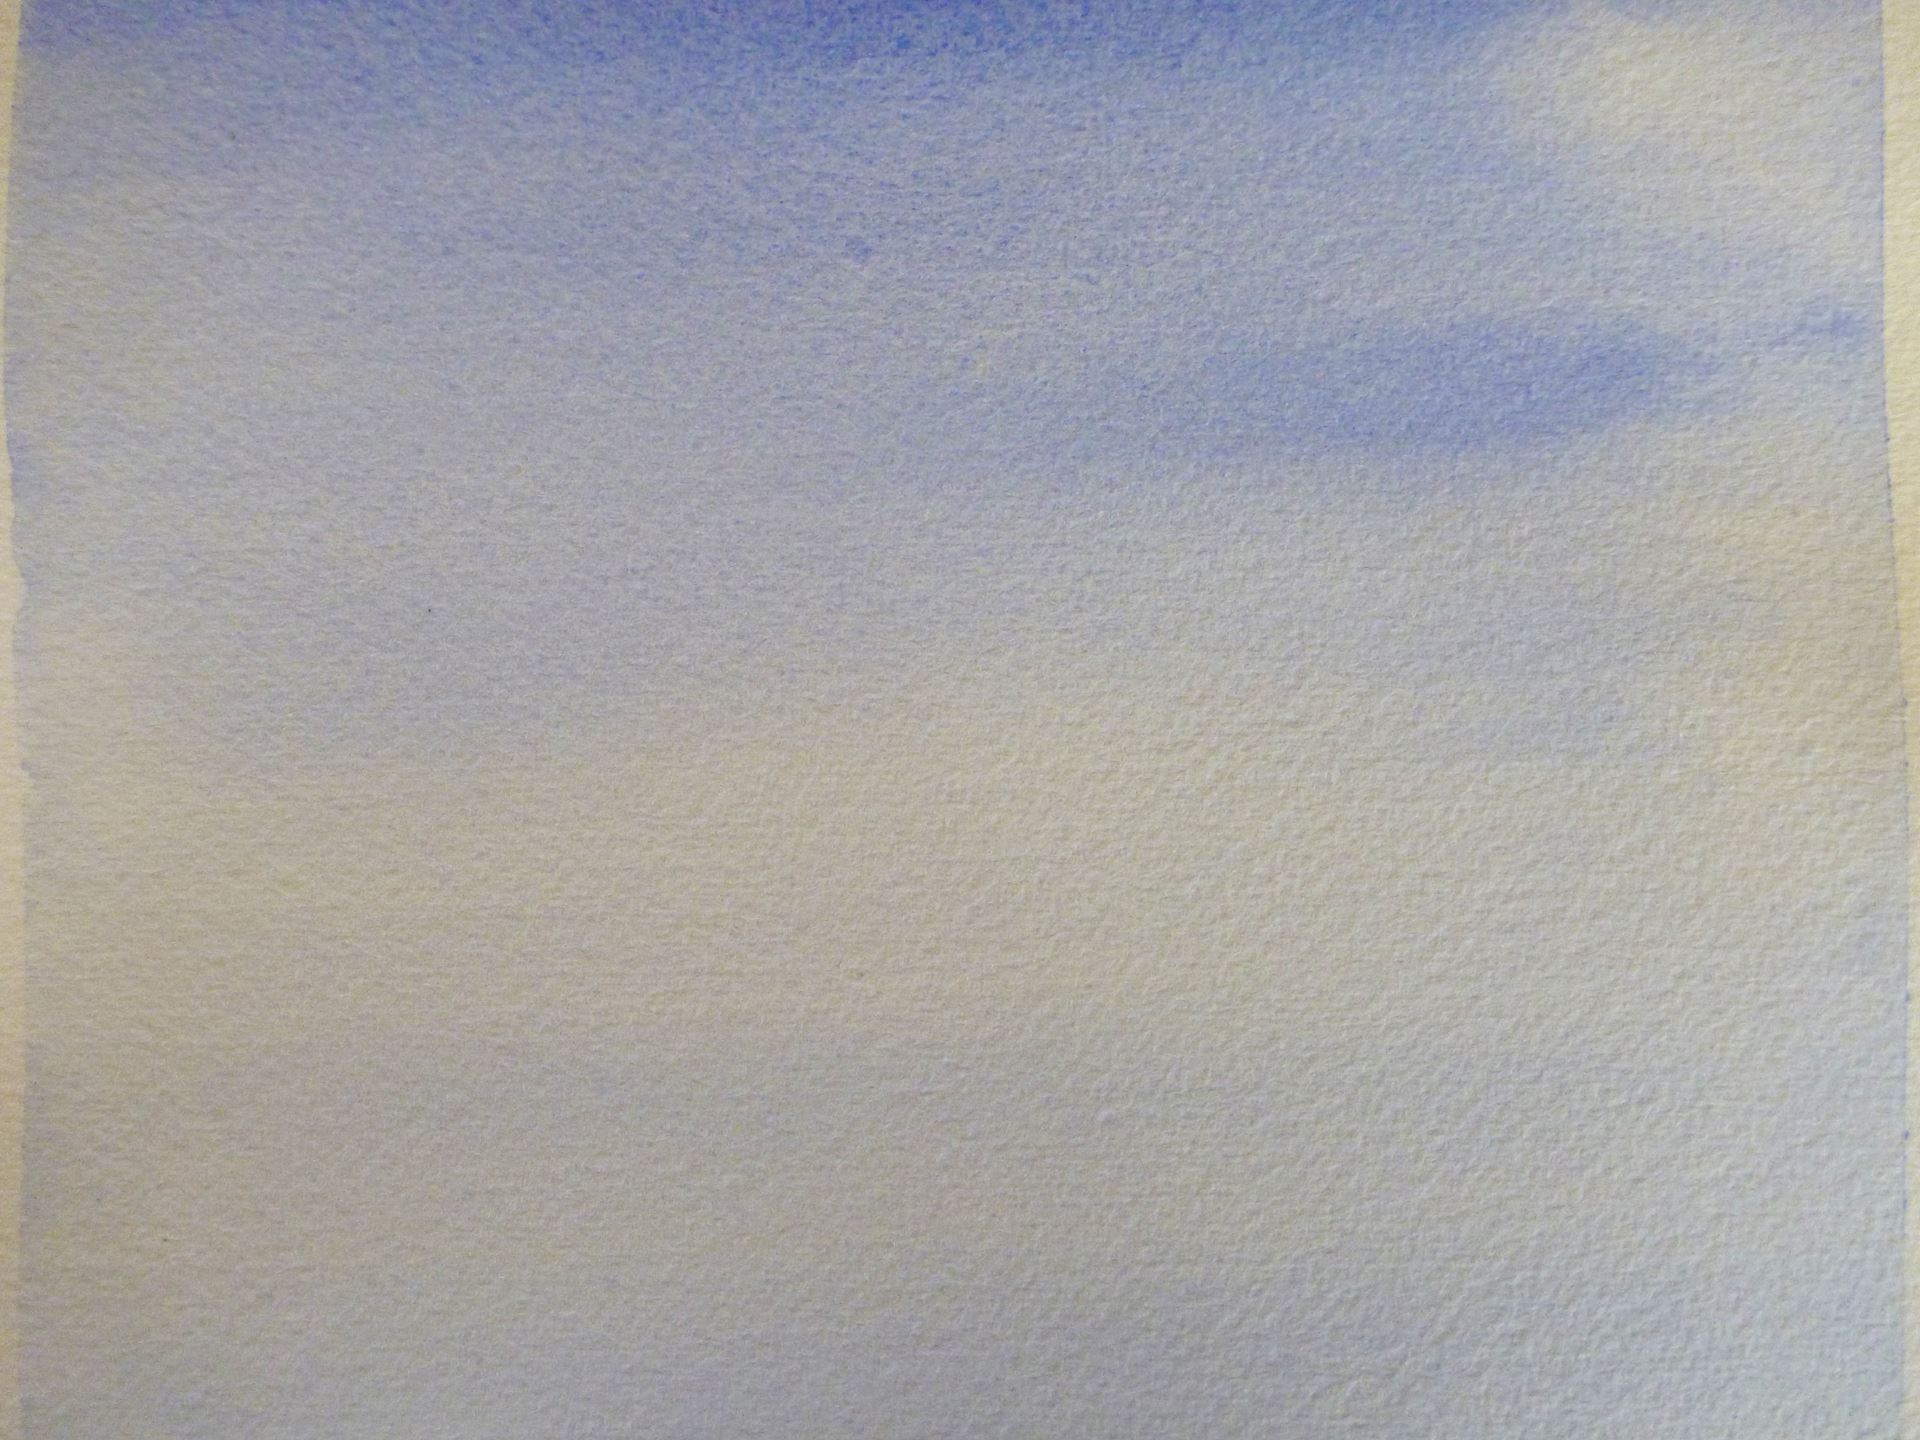
Exercise 1: Even Sky
Skies were made for watercolors! The mediums transparency, colorfulness, water content, soft edges, etc. makes them perfect for creating the illusion of a sky. Nothing can create more mood and atmosphere in your paintings than skies. They can tell us the weather, time of day, temperature, even the season and do it in a quick glance. Painting skies is essential for a landscape painter to master. The best thing is that they are relatively easy and usually created fast. Besides they are one of the most FUN thing to do!

Once you have your materials ready, start at the top with your paper at a 10-15 degree angle to let gravity help. Work downward with your loaded brush (I usually use a blue) and keep it wet until the same value exists. You will have to adjust the color by adding or subtracting the paint in your brush. Once you are satisfied , then STOP and do not go back into the wet sky. Just let it dry. Going back into the painting will usually result in a disaster!
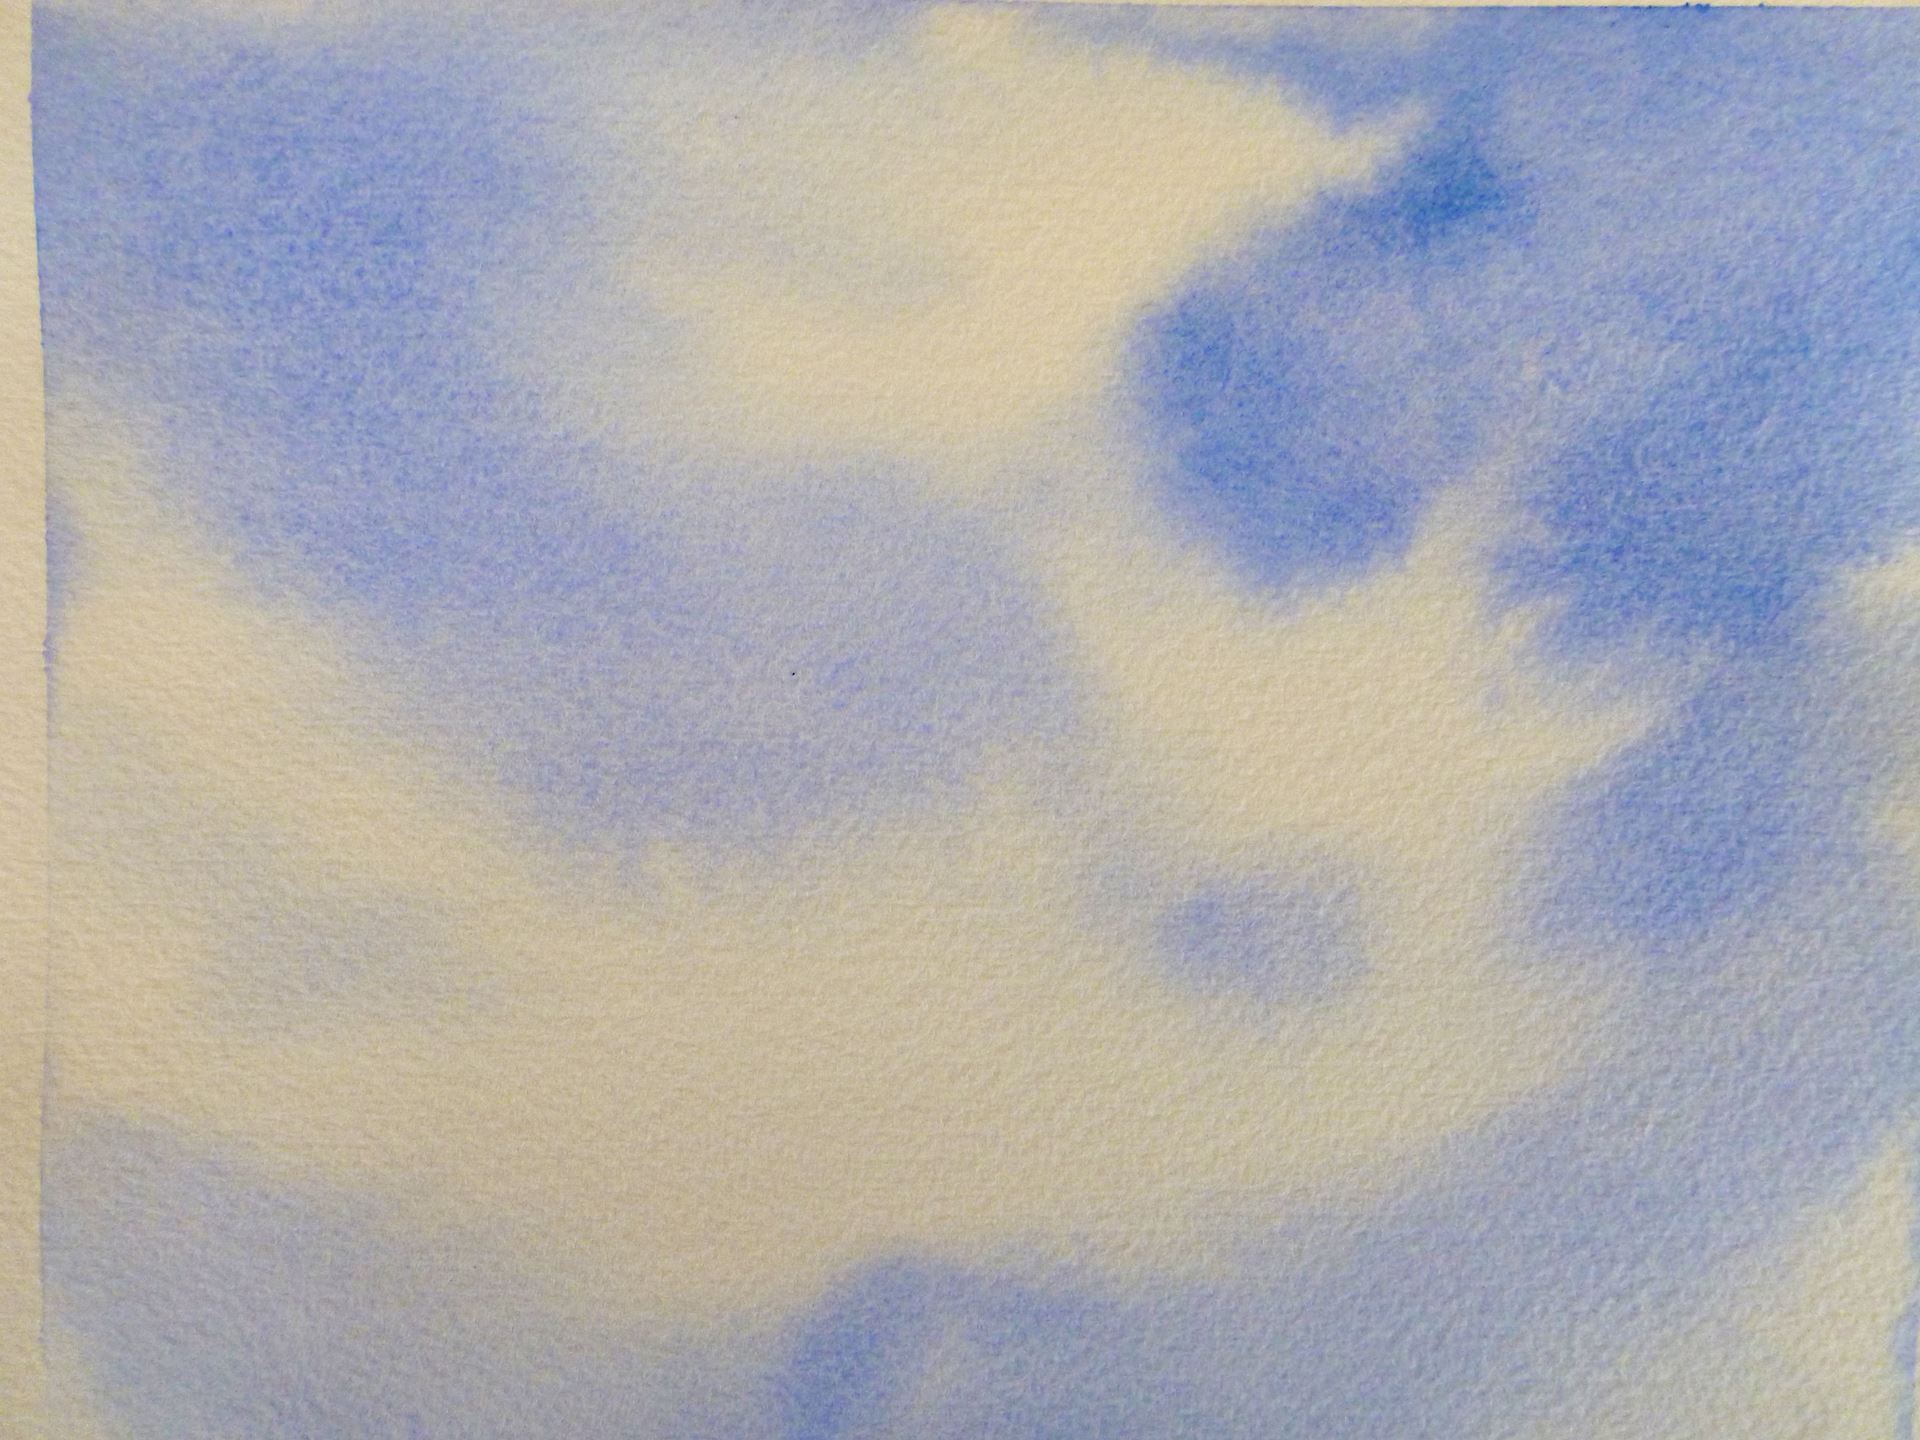
Exercise 2: Uneven sky
For an UNEVEN SKY, do the same as for an even sky but with each stroke add more water to the brush with each horizontal stroke. Skies are darker at the top (think black holes in space) and lighter at the bottom (think a halo around the earth as seen from space). Keeping working while it is still wet until you have an uneven wash, then stop and leave it alone to dry.
Exercise 3: Wet into wet
OK! That was easy and may be all you need to know to paint realistic skies. But, obviously , there are more options.
For this exercise you will need to wet the entire area of the paper where you want to paint. Something about 8 inches square will do. Add a few area of blue paint to some of the wet paper and watch it flow. You will need to be sure to save some white paper area to be the clouds. While it is still wet you might want to be sure the top is darker than the bottom like we talked before.
The WET INTO WET technique is just fun!
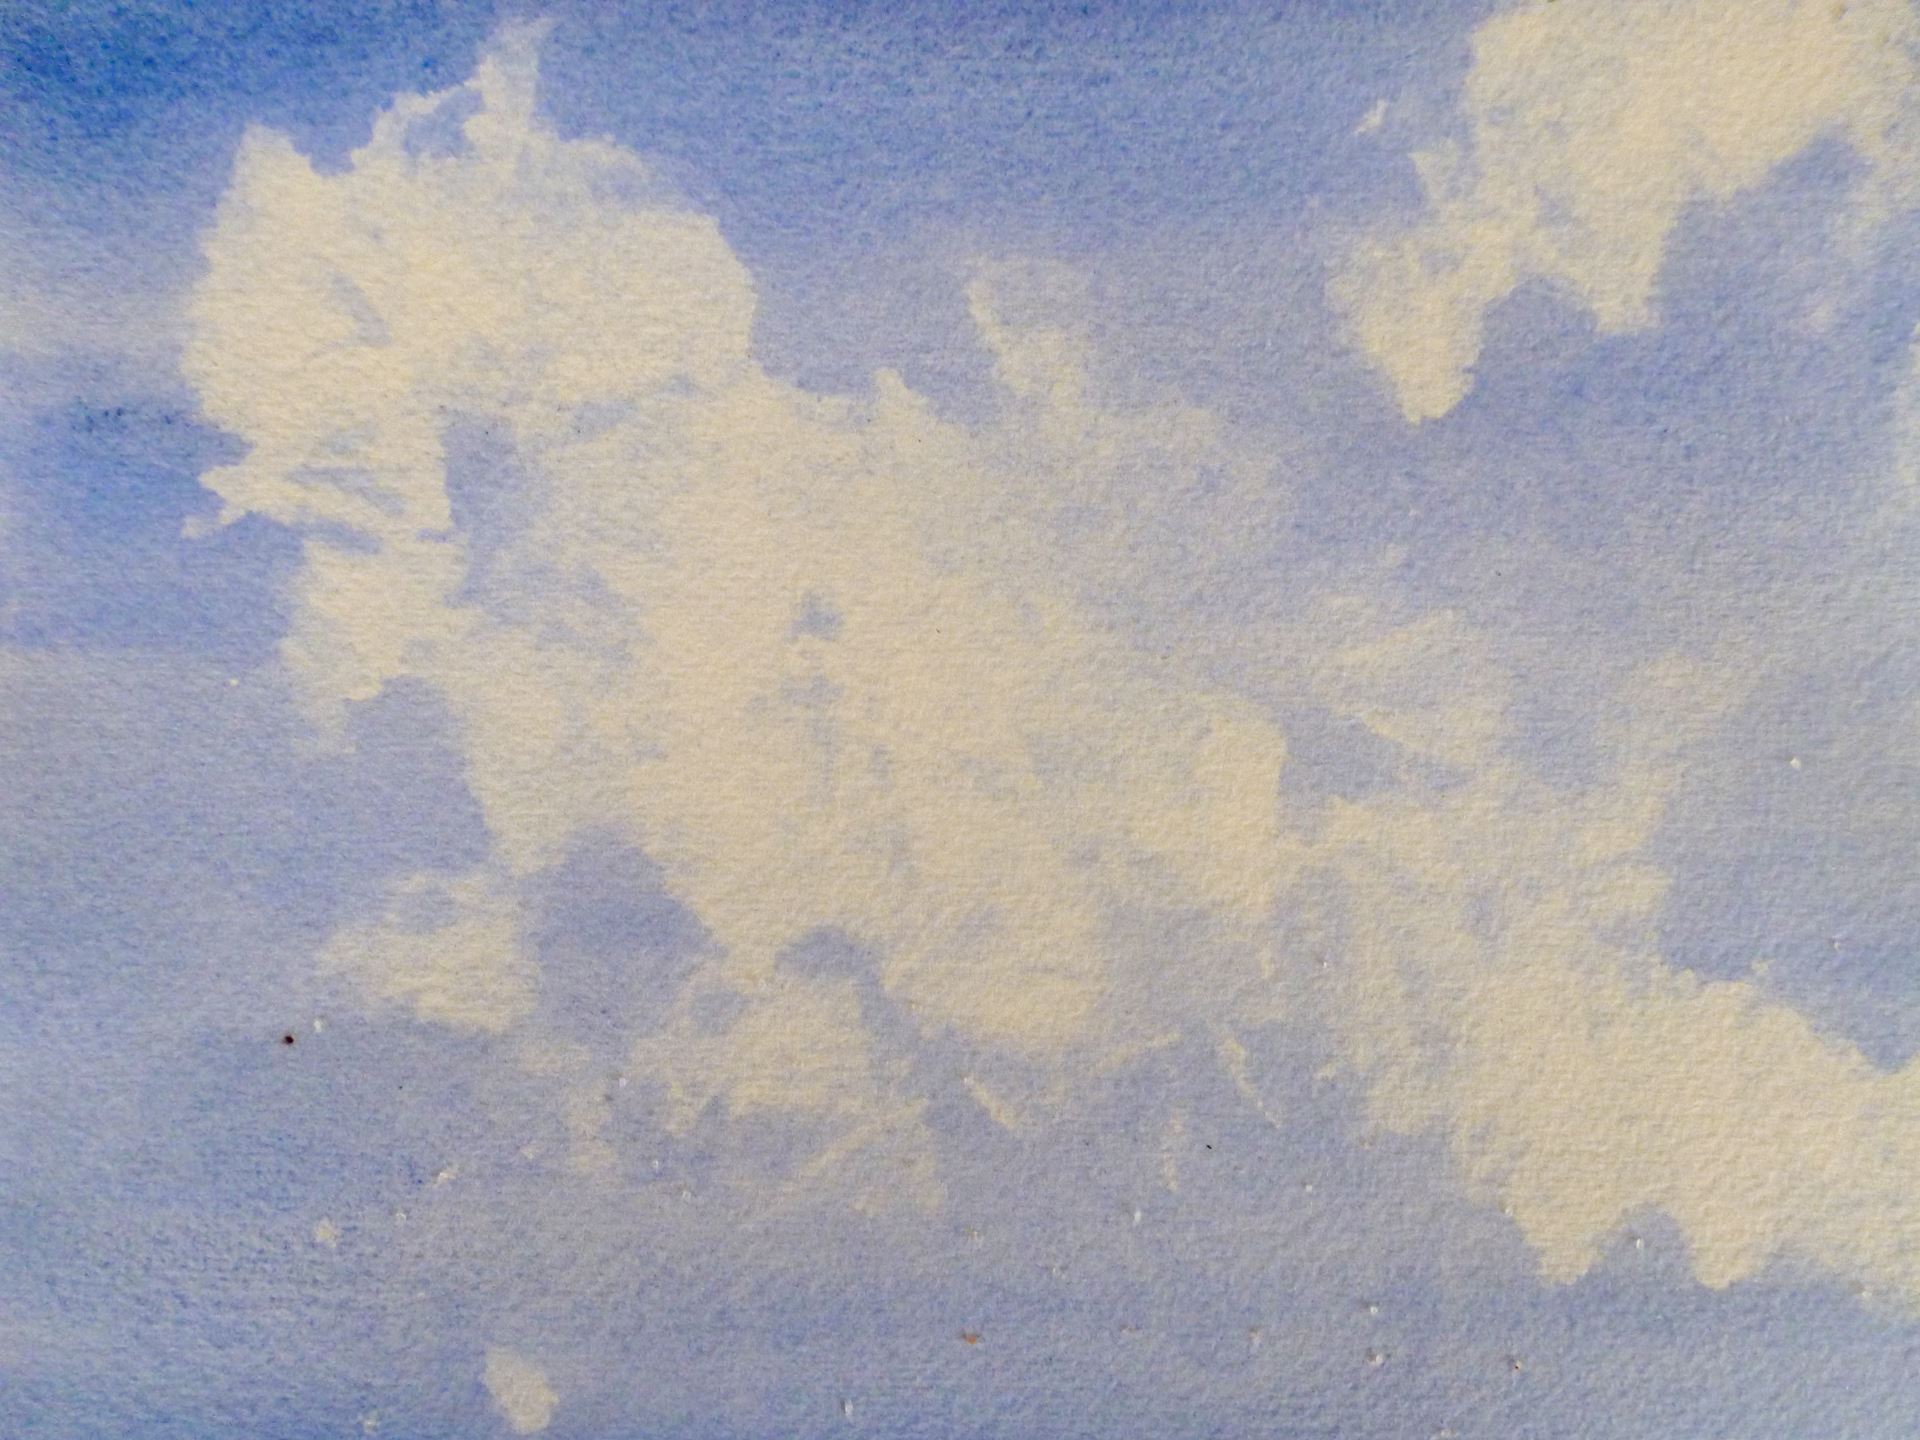
Exercise 4: Kleenex clouds
Clouds can be made by just leaving some white areas of paper as we did in the wet into wet painting or you can use the number 1 watercolor trick of all time, KLEENEX.
First do another even wash painting with a nice blue like Ultramarine. Once that is done and while still wet, crumble up a KLEENEX and " twist and lift" it onto the wet surface removing some other paint and leaving white clouds with exciting edges. Now just take a break and watch the magic happen. Teach this to another and they just might be hooked forever.
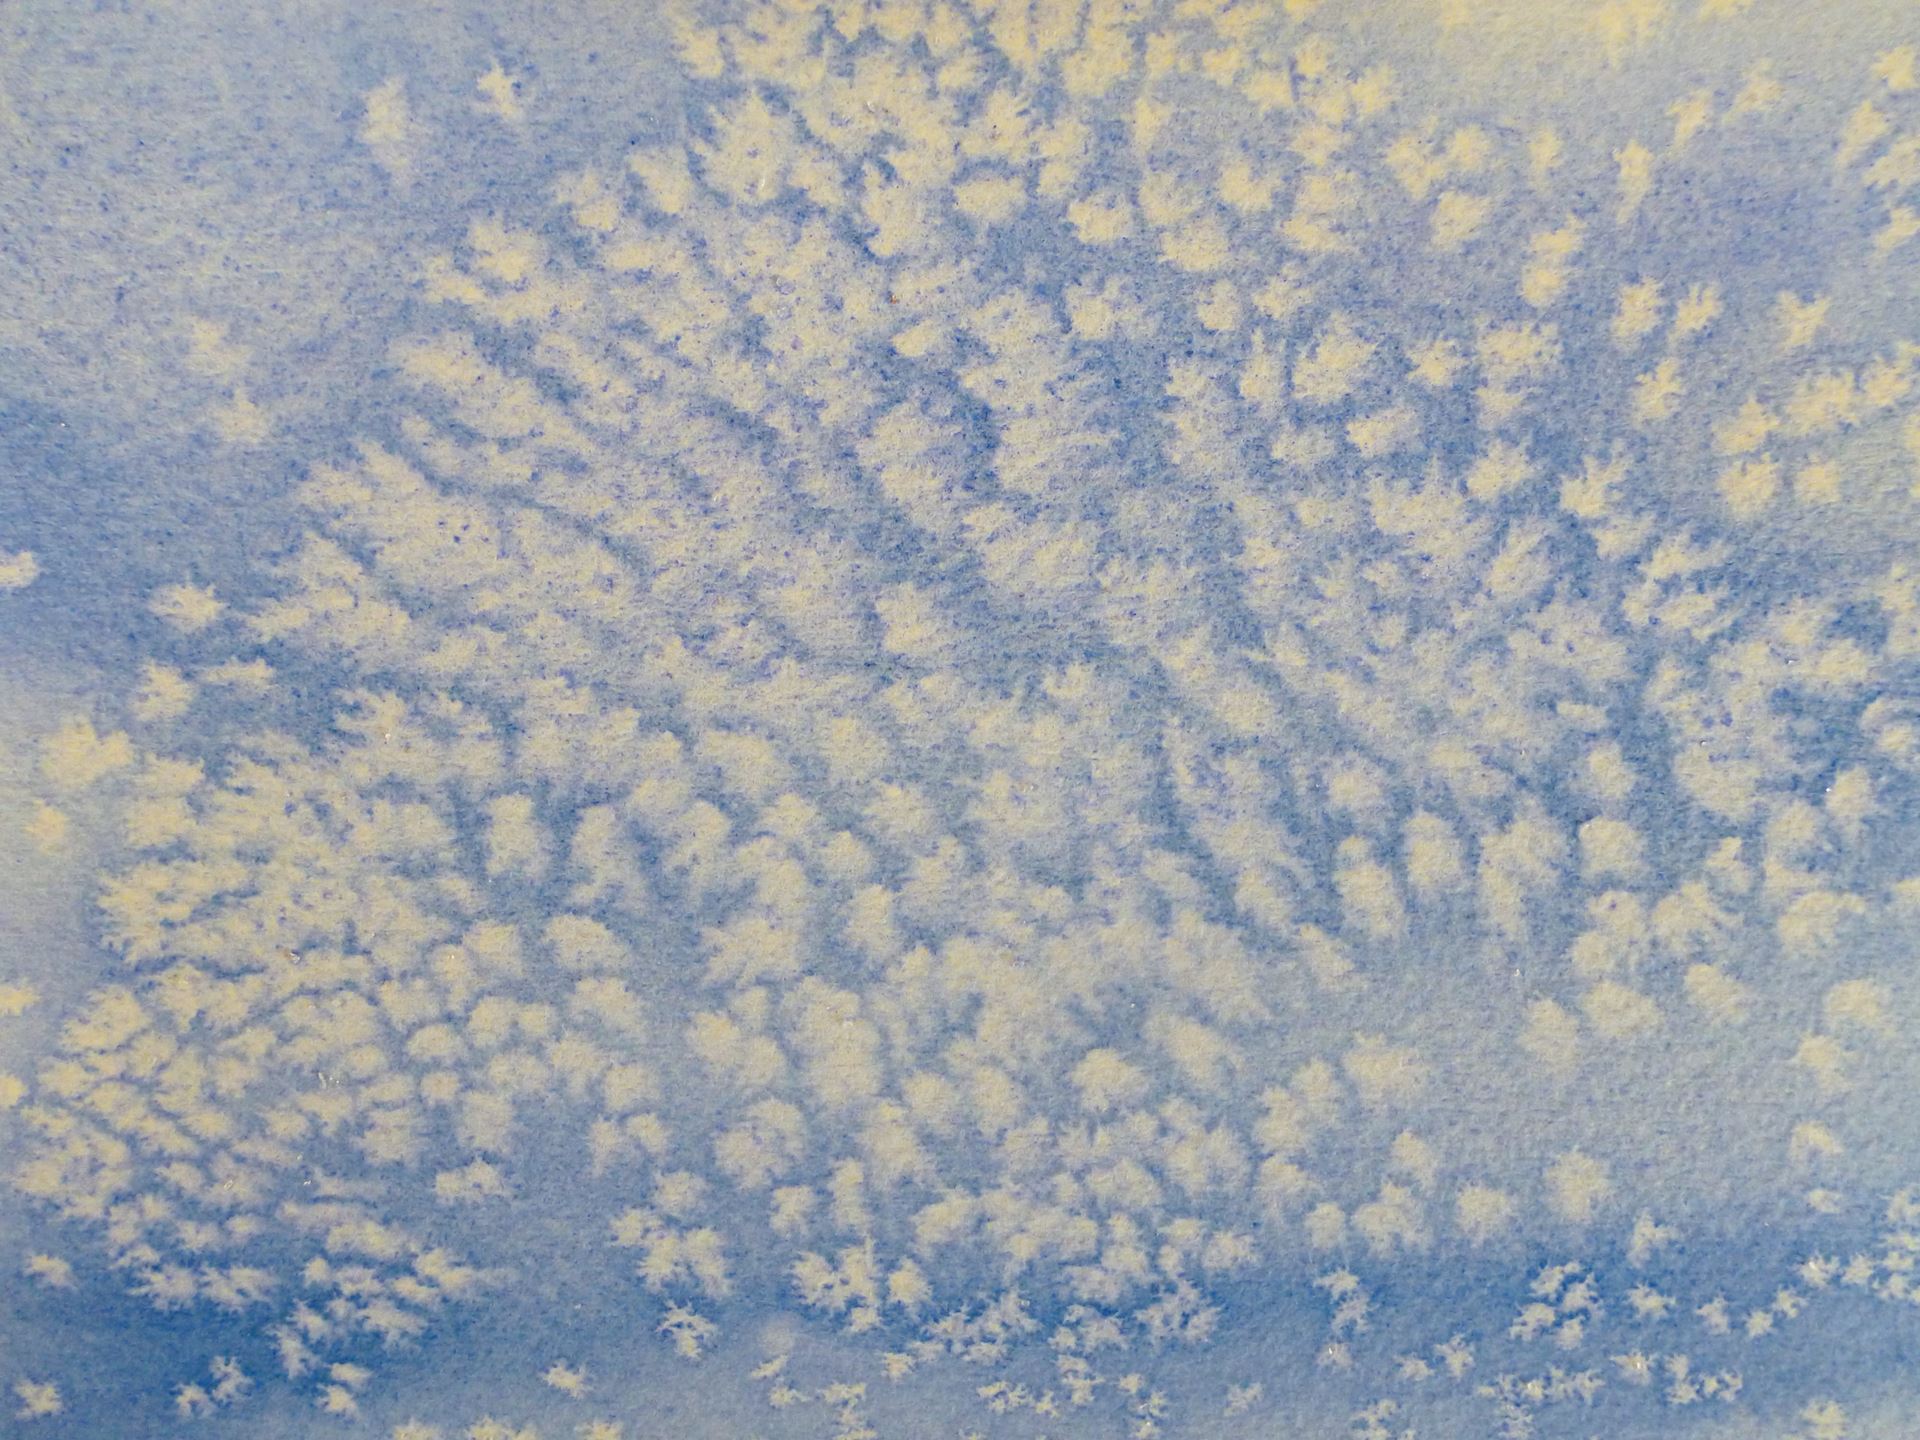
Exercise 5: Using salt
Next trick is to make it snow with a little help from SALT.
Once again we will paint an even sky or you can try this on any wet paint surface using whatever color you want. While the surface is still wet but starting to dry but still has a shine to it, sprinkle some salt (any kind will work but all the salts leave a little different size mark) onto the paper. You might have to experiment with this a little because if the paper is too wet it will just dissolve the salt and if too dry nothing will happen. A little salt in your paintings as with a little salt in your diet will do just fine. This is one of the unique tricks for watercolors so don’t try it with oils!
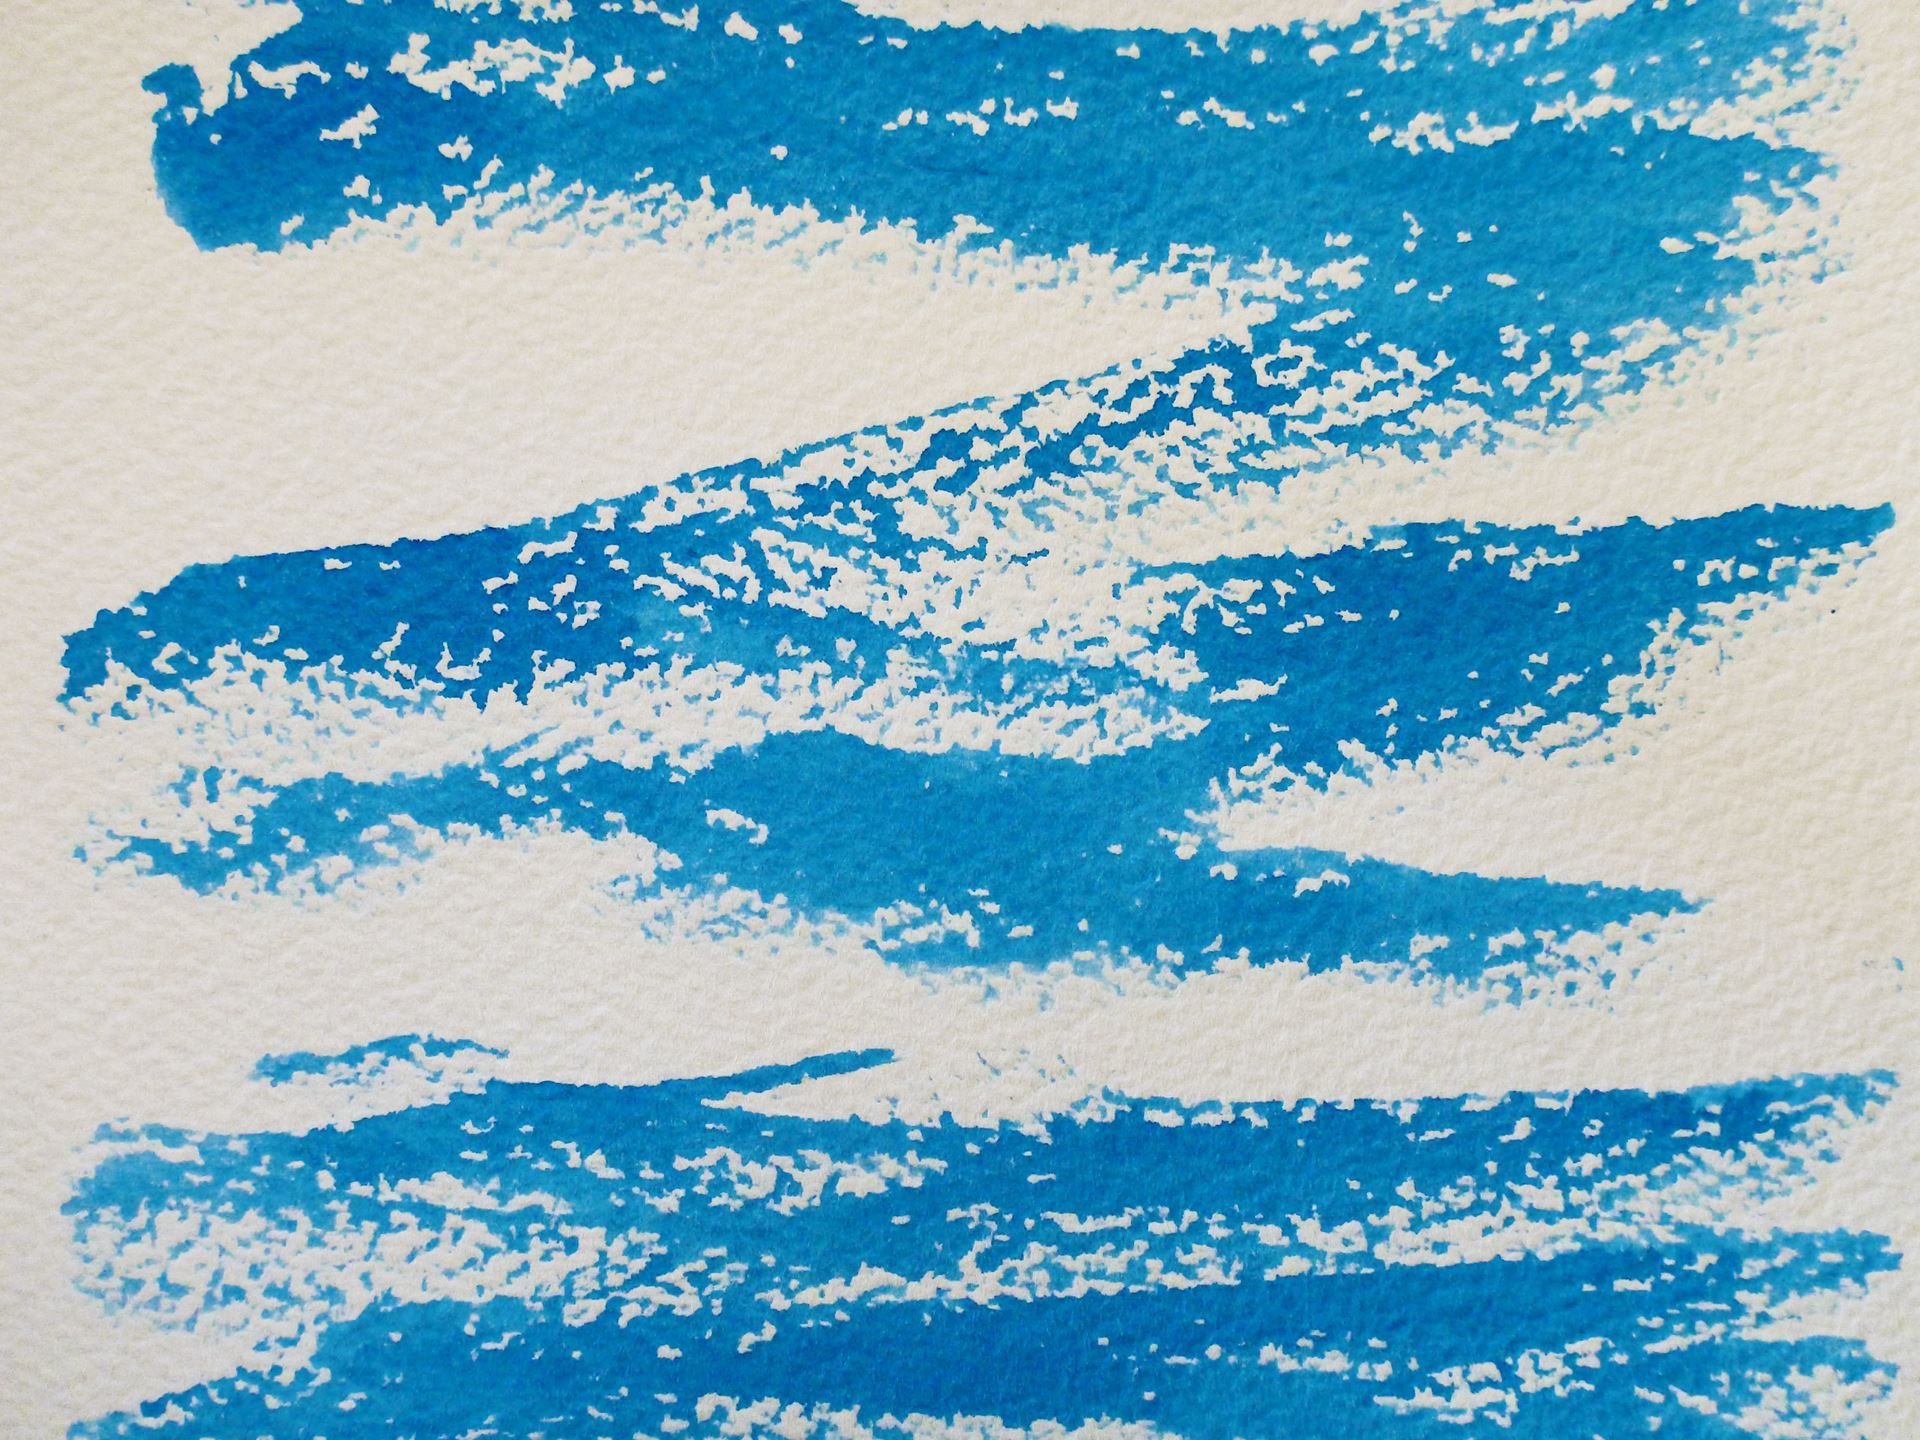
Exercise 6: Dry brush
Let’s try to paint a sky with strata like clouds. The ones that look like airplane contrail and have harder edges than normal puffy like clouds.
Work on DRY paper and charge your brush (I like 1 inch flats) with a blue. Now, drag your brush horizontally across the paper in a Z like pattern keeping in mind the need to leave white paper for the clouds. Using a rough paper will help but try not to push down too hard as you are dragging the brush across the paper). This technique is call DRY BRUSH, but the name only refers to the paper not the brush!
Exercise 7: Three step sky
Now we are going to combine a few of these simple skies techniques to do what I call a "THREE STEP SKY”.
First, create a wet into wet sky and indicate clouds by either leaving white paper or using Kleenex. Let it dry. I usually use a hairdryer to speed things up.

When the wet into wet painting is dry, then wet the entire painting again with clean water. Do not scrub , but just wet the paper. Now we will do another wet into wet painting using another color right over the first painting. Again, don’t scrub but you can still use Kleenex to make sure some clouds are visible. I usually start with a cerulean blue and then use an ultramarine next but you can choose, just make the second coat darker than the first. You should allow some of the first painting to show through, too.
When the painting is dry, it’s time to do another wet into wet painting. This time we may want to use Burnt Sienna or another ( not blue) color sparingly over the previous painting(s). Don’t forget to use some Kleenex to let some white still show through and, of course, avoid scrubbing. I know you will enjoy this one and you will be able to use this for other paintings. What we have done, is also known as GLAZING and another of the great secrets to learn to paint those things you know and love or want to know and love.
With these simple trick and techniques you will be able to create exciting, expressive skies that will set the mood and the atmosphere for your painting(s). Skies should usually be painted relatively FAST and with confidence. I know you can do it!
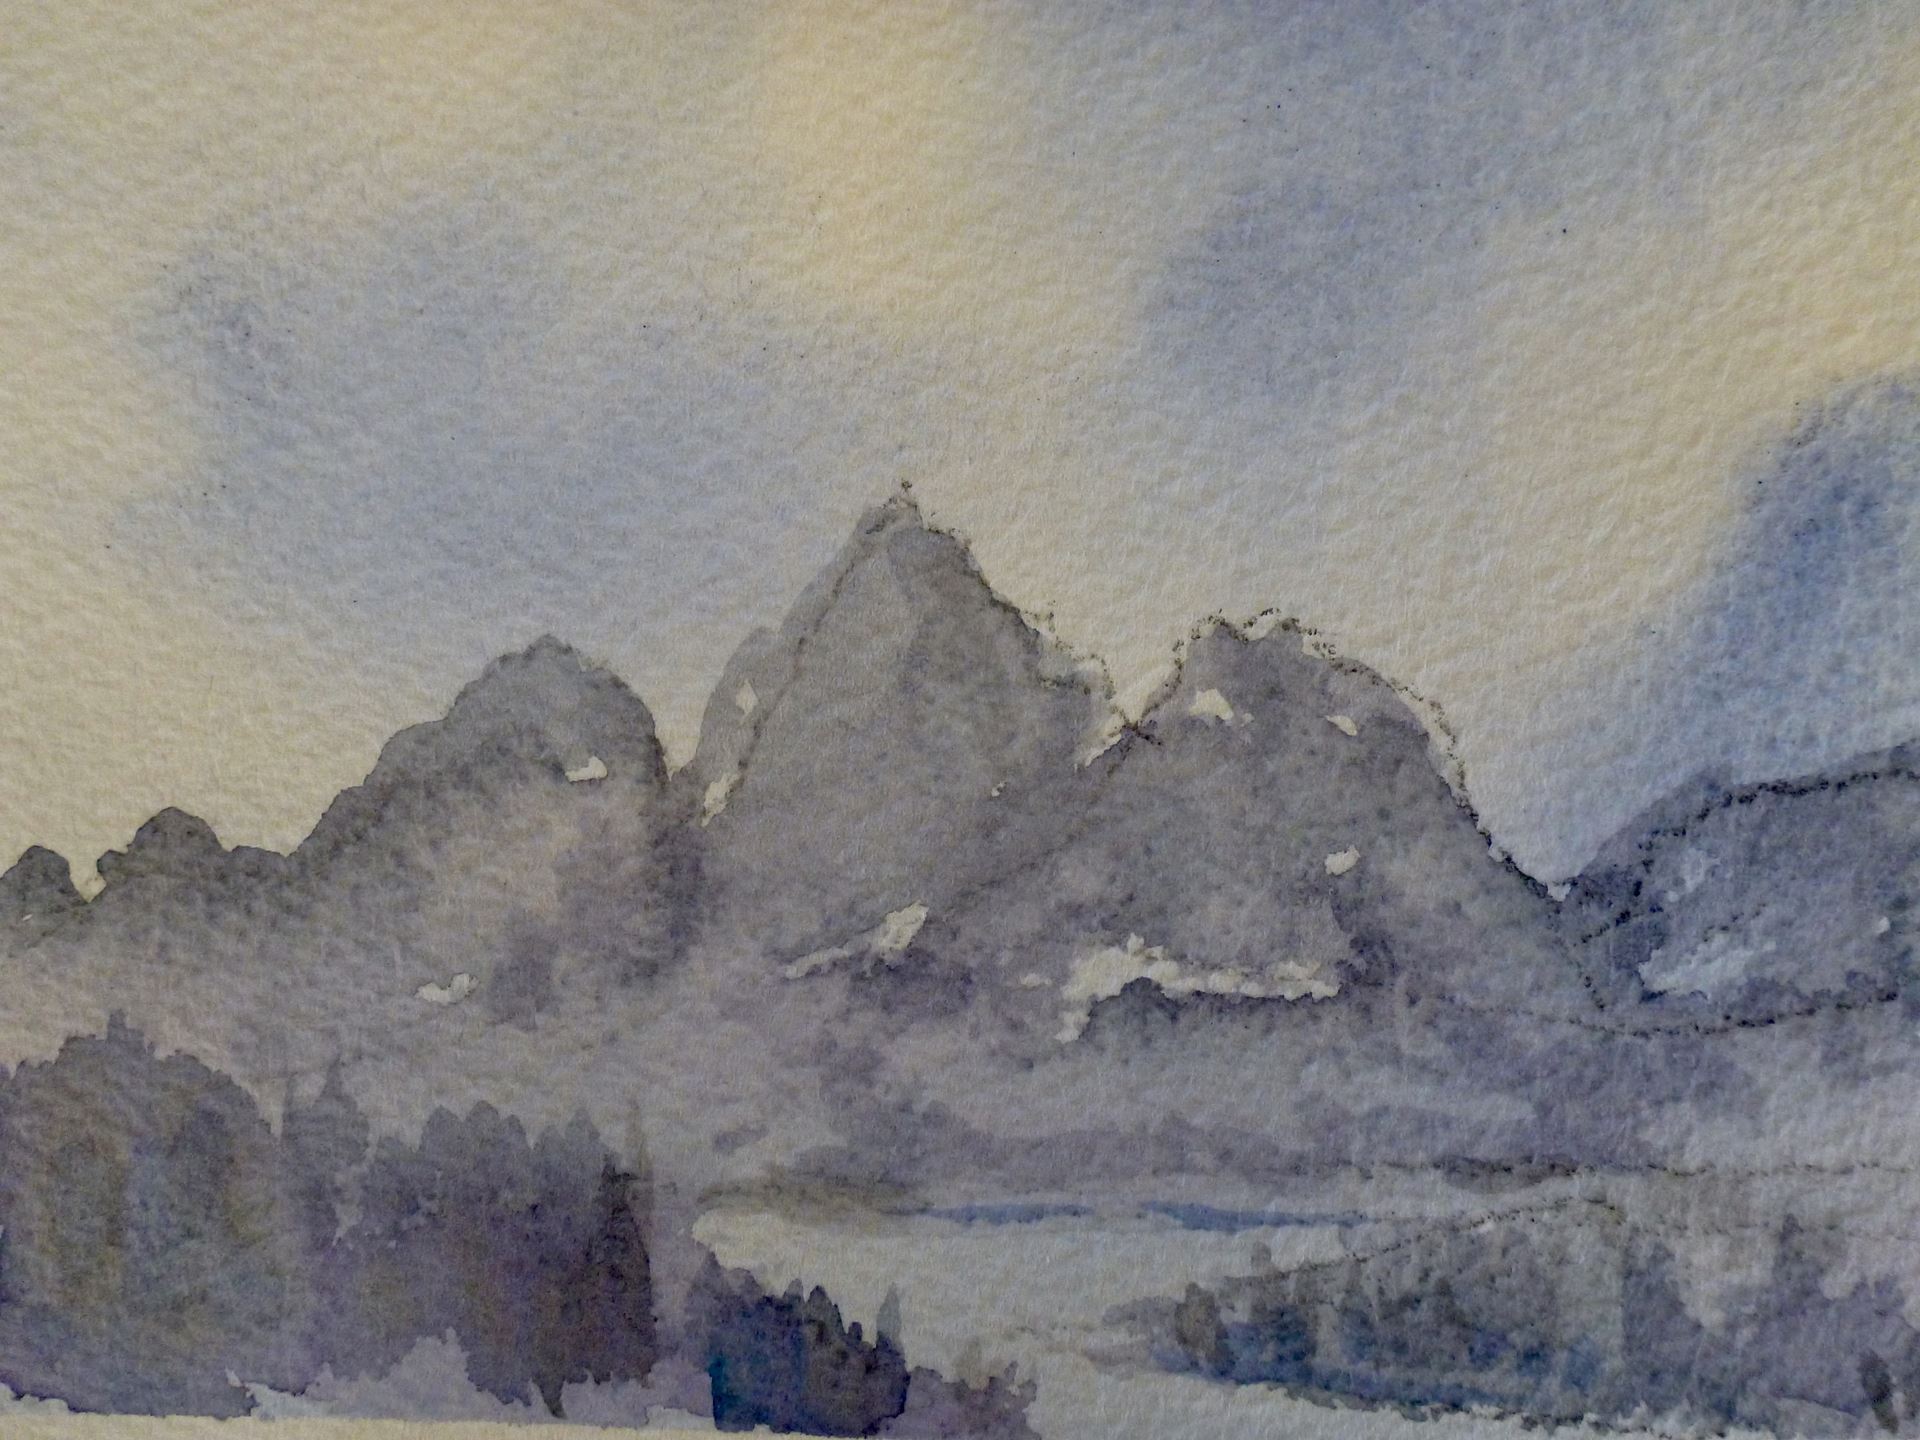
Now that you have completed these exercises, let’s put them to good use by painting in the bottom third of the paintings with some landscapes (see my examples), There, you have it. A painting with simple skies! Way to Go!

What was your favorite of these techniques? Still have questions? Let us know in comments under this post!